Tater Time

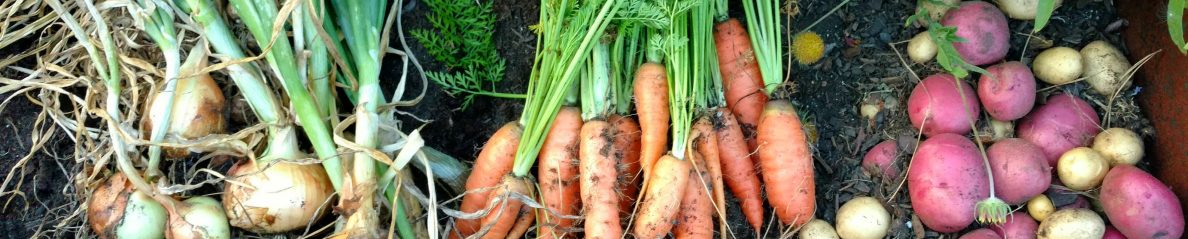
Due to our 2 freakish snowfalls, the planting season for this year is about a month behind schedule.  This is fortunate, because I am always late as it is anyway.  So, instead of my regular Valentine’s Day tater planting, this year, I planted about 3 weeks late. Typical planting dates for taters in my zone is February 15th to March 1st.   The thing is, is that Irish ‘taters don’t like hot weather; they develop best on warm days and cool nights.  So, the concern with them (and many of the other veggie varieties that prefer this weather) is that there will not be enough days of this weather/daylight length for the veggie to produce before our notoriously hot weather sets in.  Once the hot weather sets in, the taters are done producing.  So, it will be interesting to see what kind of crop I get this year.  Last year, I harvested approximately 10-15 pounds of taters per 4’x8’ bed.  Not a huge number, but I assure you, it was more than enough to last us until fall! Just remember before planting anything to check your recommended planting dates for your area (!!!!!).    

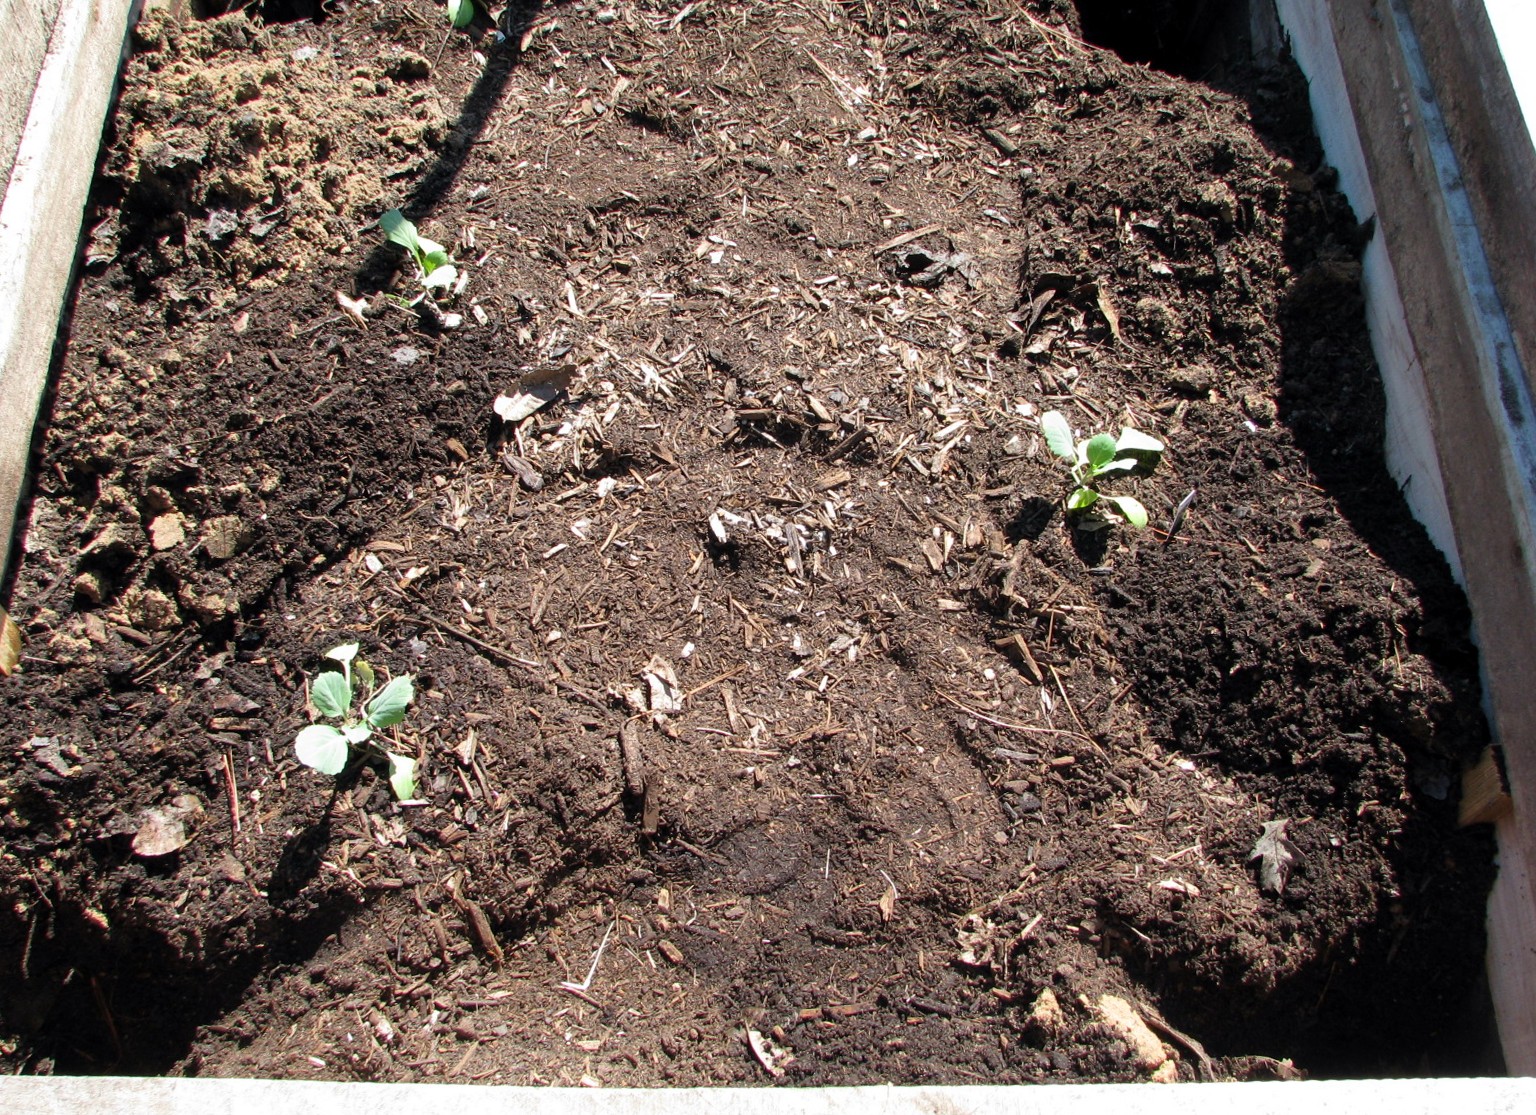
This year, I planted differently than ’09.  In ’09, I dug 2 trenches in the beds, laid my little taters down in the trenches, about 10 inches apart and covered them with soil.  As the plants grew, I mounded soil, and then straw at the base of the growing green tops, because the tubers (read: taters) grow along the stem, as long as it is shielded from the sun.  So, this year, I made 2 long rows, dug a 4″ deep little hole, and put in the taters, and covered them up.  As the stems/leaves emerge I will cover them with either straw or mulch to protect the baby taters from the sun.  

Also note that I have rotated my beds..I am not planting the same veggies in the same bed that they were in the previous year.  You should ideally have a 3 year (or longer) rotation on your beds.  For example, let’s say in Bed #3, I will plant tomatoes this year.  I will not plant tomatoes in that bed again for at least 3 years.  This helps to prevent certain vegetable specific diseases/nematodes/etc from building up in the soil.  What happens is that your crop will steadily diminish in quality and quantity over time. 

 Here’s my very quick How-To.  Since I didn’t save many taters from last year, I bought ‘seed potatoes’ from the feed store.  These are small to medium potatoes from which your own plants will grow.  I cut the taters (well, Jason did it this year) into hen’s egg size pieces, making SURE that there is a good ‘eye’ on each piece. 

Here is a piece of a seed 'tater with a great eye. The eye will develop into the aboveground plant. The new tubers/taters will develop below.


Now you must let the pieces dry out for a few days.  We usually wait 2-3 days.  This allows the fresh cuts that you have made to heal.  After the cut sides are dry, now is the time to plant.  Since I’ve already described my beds, here they are:  

2 Rows of taters. I planted each piece about 3-4" deep and about 8 inches apart.


This year I planted Kennebec Whites and Yukon Golds.   Now it’s just up to Mother Nature!  Well, and I guess me, just a little bit.  I have to make sure I don’t let them get too terribly dry.   So, come about June, I hope to have lots of taters.  As you can tell, I do not agonize over how to plant my vegetables.  I DO research, of course, but I don’t agonize over all of the numbers, and facts and figures for the most part.  Some plants can be rather picky, and some plants you can pretty much throw on the ground, and they’ll grow.  As you garden and have your own successes and failures, you’ll get more comfortable about what is important and what really just isn’t.  

 Regarding seed potatoes, you can grow and keep your own.  I plan to keep some medium and small potatoes this summer just for this purpose, and I will plant a fall tater crop around the first of September.  I have read it is recommended to not cut these, but to plant them whole.

So Far Behind

Well, dear readers, I have taken many wonderful pictures just for you, and I am sooooo terribly behind in posting them.  I am going to post some for you now, with captions.  Please excuse the lack of cohesiveness in the subject matter!


Part of my herb garden leading to my deck. Fall of '09
Green tree frog hanging out on our deck
Small earth snake we found under a pallet. Yes, I am holding it. They eat small invertebrates, not people, so I felt pretty safe!
We began using pinecones as fire starter. Makes a neat pic, huh?
Pinecones work great to start fires...just make sure you have a small army of them and that they are fully opened.


That’s it for now…new posts coming up soon!

Waffle-licious

Glorious, golden waffles
Fresh out of the waffle iron


 There’s nothing quite like homemade waffles.  Nothing in a box mix even comes close to homemade.  Funny thing is, I hadn’t ever even made my own waffles until a few years ago.  And I JUST started making my own pancakes.  What in the world was I thinking?  Now, copy down this here recipe and get your waffle iron heating up…

Waffles

2 eggs (I use one goose egg)

2 cups flour (I use one cup all-purpose and 1 cup whole wheat)

1 3/4 c. milk

1/2 c. vegetable oil

1 Tbsp. sugar

4 tsp. baking POWDER

1/4 tsp. salt

1/2 tsp vanilla extract

Preheat your waffle iron.  Beat eggs in a big bowl until fluffy.  Add in flour, milk, oil, sugar, baking powder, salt, and vanilla, JUST UNTIL SMOOTH.

Spray iron with non-stick cooking spray (usually only takes one application for all waffles).  Pour a small amount of mix onto hot waffle iron (I use a small gravy ladle for this).  Cook until golden brown.  Makes 6 servings.

The trick to really great waffles is not to overcook them to where they are hard and crunchy, but like a pancake with a light crust.  Mmmmmmm, now douse those babies with some syrup, pour you a cup of coffee and enjoy!!!


Good to the very last bite…

Caterpillars in the garden

 I have been reading an excellent book: Four Season Harvest by Eliot Coleman.  I guess I should say I have been reading it and re-reading it for about 3 months now and still have not progressed past Chapter 2.  This is for the simple fact that: A. I have children and cannot finish any task, period and  B. I get so inspired by the book that I run out and do something new in the garden and lose my place.  Well, FINALLY I have accomplished something…all by myself!  In the book, the author describes the French method of using ‘chenilles’ (French for ‘caterpillar’) in the garden.  Not actual caterpillars, mind you, but rather low, little ‘greenhouses’ which will greatly expand your growing and harvesting season to year-round.  So, the other day I decided that I was capable of creating such and I gathered all the necessary tools and implements.  For those of you who are unsure about building your own chenilles, let me relay some personal truths to you now. 


There are three things that I cannot do well.   

1.  Cook rice.  

2. Put icing on a cake and make it look like anything but a sheer disaster, and lastly;  

3. Hammer nails.  

I can do a great many things well, excluding those 3 things.  I had completely forgotten about number 3 until I went to hammer in some staples during my chenille-building experience.   

Bearing that in mind, let me give you a step by step instruction lesson.  

First, I took some 1/2″ PVC piping and I cut it to 100″ lengths.  This DID require the use of a power saw, and yes, I actually did this all alone.  How is it that I am deadly with a hammer and not a power tool, I do not know.  Anyway, because I am working off of my 4’x8′ raised beds, I guesstimated that 3 pieces should be sufficient for holding up my plastic.  I then dug 6 holes in my beds; 4 on the far corners and then 2 more in the middle of the bed, all in the interior of the bed. The holes need to be about a foot deep, so that when you set the pipes, they will be sturdy.

One arch is now in place

Then, I took a piece of the pre-cut PVC, stuck one end in a hole and CAREFULLY bent it over (yes, it WILL bend) and stuck the other end in the opposite hole.  This creates an arch, which will be the support for your plastic sheeting.   

Next, I back filled the holes, using the end of the handle for a ‘tamping stick’.  You want to pack down the soil around the pipes for stability reasons.  I backfilled about 3-4″ of soil at a time, tamping it down inbetween fills.  So, then I repeated this process with the middle arch and the arch at the opposing end.  Now, here is where my hammer comes into play.  I took some small staples (forgive me, I don’t know exactly what they are called but they are the kind you hammer in) and hammered a staple about 3/4 of the way into my raised bed sides right above where the PVC met the soil.  I had to leave an opening in the staple because I needed space to run some twine through it, therefore I did not hammer them in, or, attempt to hammer them in, all the way.  The twine secures the plastic sheeting against the arches.   

(Staple hammered into place where arches meet the soil)


I already had some plastic sheeting handy, though it was actually too small for completely covering my arches, I still chose to use it, since I didn’t really want to fork out more $ for another roll of it.  The plastic should be long enough to completely cover the arches, leaving several inches on the sides and a few feet on the ends. I use the clear plastic that is intended for painters to cover floors. I buy the thickest one they offer.  


 SO, now I had 3 arches, to the inside of my beds, and now it was time to cover with the plastic.  I took a staple gun (DANGER, Will Robinson!) and stapled the end of the sheet to the short end of the bed, and ran it over the arches to the other side, then stapled that to the opposing end.  NOW, it was time to run the string in a zigzag pattern, through the staples, which secured the plastic, holding it in place and bracing it against the wind.  So now I had something resembling a miniature covered wagon, sitting in my front yard.  Can anyone yell, “Zucchini, HO!” ?  

twine is run through the staples to hold down the plastic
Finished 'chenille'. As you can see, the plastic is way too short on the sides. It should be fully touching the ground.
Venting the chenille. When weather gets too warm, it will be necessary to keep the plastic pulled up so your plants don't cook!
To vent the chenille, I just pulled up the plastic in the center and secured with twine.

Ok, purpose of these ‘chenilles’.  They protect your seedlings/plants from frost and wind, which will totally zap your winter veggies.  They hold in the heat via the greenhouse effect to keep your little plants warm and toasty while it’s cold and crappy outside.  Thin leaved veggies (like lettuces, etc) do like cooler weather but don’t ‘do’ heavy frost settling on the thin leaves.  You’ll come out to a garden full of mush the morning after a frost.  Thicker veggies, like broccoli and cabbage, actually can handle light frost with no problem, but even still, I feel better protecting them from the elements.  The arches are low to the ground for this reason: as we all know, heat rises.  If you make the arches too tall, the trapped heat will not be in contact as much with the plants.   

The chenilles that the French use, according to this book, use thick wire hoops, and the wire is bent in an arch, and then a small circle where it meets the soil.  This is where my staples came into play.  The little circles are used to hold the twine in place.  Sorry if I am doing poorly at illustrating this with words…I am a visual person myself.  Anyway, the ends of the plastic are secured via a stake.  Soooooo, if you do not have raised beds, then this method will work for you.  I just happened to have the PVC handy.  My husband is the Mr. Haney of Maydelle.  Anyway, here’s the other cool thing about these chenilles.  When it is warm outside, since you don’t want your little plants to cook, you will need to ‘vent’ your little chenilles.  This is easily accomplished by pulling up the plastic in the center and securing it with a piece of twine.  This allows the trapped heat to escape.   

Thus far, I am loving my little ‘caterpillars’.  I do need to build some more, though I may use the wire method next.  Also, another way I have done these is to use a tomato cage made out of that 4″x4″ stock fencing, unhook it, flatten it somewhat and use these as your arches.  I did this with my cabbage and broccoli, and they did really well.  I was in a real recycling mode that day.   

Using an old tomato cage for support, it can be covered with plastic sheeting to protect against frost. These broccoli were planted October of 2009.
Broccoli which survived in spite of my care...February 2010

 Hope this inspires you all for this fall!!!  

Cabbage Patch Cat??? Mr. Bobo discusses the benefits of row covers while frolicking amongst my Jersey Wakefield cabbages.

Tomatoes in February…Let Spring 2010 begin!

This year, I ordered most of my plant seeds through a seed company called Baker Creek Heirlooms (rareseeds.com).  They are non-GMO certified (meaning that their seed is tested and is free of any genetically modified organisms), and offer a huge variety of heirloom seeds.  Why are heirlooms important?  Because they are literally seeds of the past, and they are not hybrids, which means that you will be able to collect and save seeds from the plants that you grow. Hybridized plants do not breed ‘true’.  This means that the seeds from a hybrid plant may or may not reflect the qualities of the parent plant.  Whereas, a heirloom plant will produce seeds which will produce exact genetic copies of the parent plant.  Moving on…

So, I got my seeds and headed on over to Wally world, where I picked up a 6 dollar Jiffy brand 72 cell greenhouse.  I have used them in the past, and I have been pleased with the results.  Plus, I mean…they’re only six dollars and the peat pellet refills are extremely cheap, too.  I put 2 seeds in each peat pellet, and I planted tomatoes, peppers, and parsley.  That was on February the 5th.  Today is the 15th, and most of the tomatoes have sprouted well and one pepper is just beginning to sprout. (thanks, Tayce!) So, I will let the little plants keep on growing until they are looking crowded and then I plan to move them to a larger pot (yogurt cup, maybe?), and let them get a little bigger before transplanting them.  This will be my first year ever to grow all of my own stock.  Exciting!!! 

Now, for planting dates.  If you are here in Texas, here is the recommendations I typically go by:  Spring Planting Dates  I am in Region III.  March 15th is considered our last frost date, to which you all who live here know that to not be the norm.  We usually have one last frost in April.  SO, if you decide to plant your warm weather crops, such as tomatoes or peppers come March 15th, you’d better bet your buttons you’ll have to provide some frost protection at least one more time, or your baby plants will suffer frost damage and possibly die.  For a freak cold snap, it is often enough to cover the plants with milk jugs with the bottoms cut off to completely cover the plants, or you can use buckets (I love my 5 gallon buckets).  This prevents the frost from settling on the delicate leaves.  During a late cold snap last year, I used milk jugs for my peppers and tomatoes, and while the tomatoes suffered minor damage, the peppers didn’t fare as well, which is why THIS year I won’t be planting them until mid April, but that’s just my personal choice.  I probably, in retrospect, should have also thrown an old blanket or some hay over the jugs, too.

If you are in East Texas, here is a great Month by Month calendar on what to do in the garden

For recommended varieties of veggies for East Texas, look here.  In fact, this website, set up by the Smith County Master Gardeners, is great.  Go to East texas home Gardening tab for lots of info.  Recommended varieties are the ‘tried and true’.  However, this year, I am adding a lot of different tomato varieties, so I am excited to see how they do!  There are test gardens all over the state who are continuously trying out different varieties to see which ones perform the best overall. 

The Country Pantry

My friend Jamie asked me the other day to help her come up with recipe ideas.  But, you can’t make a dish without the right ingredients, right?  So, I tediously wrote down a list of most everything I have stocked in my pantry.  May I also add that I began this list about 6 weeks ago, and I had so much stuff in there my hand cramped as I was trying to record it all and I had to take a 6 week leave of absence from that project!   Without any further ado, here is:

 My Official Pantry List:

Tomato Products:

Canned spaghetti sauce

tomato sauce

tomato paste

Whole tomatoes (including home-canned ones, I recommend buying whole ones and cutting them up for recipes, the flavor is better!)

tomato based soup base (home-canned)

Red enchilada sauce

Canned fruits:

Pineapples, in own juice!

Pears in own juice,

Peaches, in juice

Cranberry sauce

Beans/Legumes:

Black beans

Kidney beans

Garbanzo (chickpeas) Beans

Great Northern Beans

Pork N’ Beans

Black eyed peas

Pinto beans

Canned Veggies:

Diced green chilies

Pimiento peppers, diced

Creamed corn

Hominy

Sliced Mushrooms

Green enchilada sauce (made from green chilies…qualifies as a veggie for me!)

Miscellaneous:

Organic peanut butter

Solid white albacore tuna

Wolf Brand Turkey Chili, no beans (tastes GREAT)

Dry Goods:

Quick cook oatmeal

Organic rolled oats (takes a little longer to cook than quick cook)

Bob’s Red Mill Muesli cereal

Bob’s Red Mill Steel Cut Oats

Bob’s Red Mill 10 grain hot cereal (can you tell I’m a fan of Red Mill now???)

Cream of Wheat

Assorted whole grain cereals, like Kashi Go Lean/Go Lean Crunch

Cheerios

Popcorn, both microwave and kernels

Elbow macaroni

Egg Noodles

Vermicelli

Spaghetti

Fettuccine

Boxed Mac N’ Cheese

White Rice (oh no!)

Instant white rice (horrors!!!)

Instant brown rice

Organic brown rice

Scalloped potatos (boxed)

Taco shells

Panko bread crumbs (for a crispy, crunchy coating)

Seasoned bread crumbs

Rice A Roni

Cornbread mix (I prefer my own, but just in a pinch….)

Graham crackers

Wasa whole grain crackers

Stuffing mix, chicken flavored

Jello, assorted flavors

Mixes/Spices:

Homemade Taco Seasoning

Homemade Cream Soup mix (AWESOME, recipe to come later!)

Onion soup mix

Dried Legumes:

Pinto Beans

Lima beans

Lentils

Navy Beans

Vinegars/etc:

White vinegar

Cider vinegar

Red wine vinegar

White wine vinegar

Rice vinegar

Balsalmic vinegar

Sherry cooking wine

Dry white wine (I use Chardonnay, in the little 4 packs)

Dry red wine (Usually use Cabernet Sauvignon or Merlot in the little 4 pk)

Assorted cooking goods:

Olive oil

Vegetable oil

Sweetened condensed milk

evaporated milk

Molasses

Vegetable shortening

Pancake syrup

Baking soda

Cornstarch

Brown sugar

White sugar

Flour (we are currently switching from white to whole wheat)

Powdered sugar

Yellow cornmeal

Powdered milk

Sweetened coconut

Cocoa

Pickling salt (for making canned goods)

Beverages:

Instant coffee

Regular coffee beans

Hot cocoa

Black tea

Whew, see why my hands needed that 6 week break???  Let me also add that I am currently switching everything over to whole grain products where possible, and I am trying to get away from white sugar and white flour, too.  So, all of my noodles and such will soon be whole wheat pastas.  I’m trying to get rid of as many possible processed foods as I can without going crazy!  I hope that this list will help you with stocking your own pantry.  Recipes will also be coming soon!


Country Cleanin’

Well to preface this post, let me begin my revealing my December ‘Mystery Craft’.  It was how to make Christmas Trees out of magazines a la Martha.  You can see them here: Folded Magazine Trees.  Admittedly, mine did not turn out as glorious as Martha’s staff’s did, but who’s checking?  Also, you really need to get Martha’s Bone Folder, which can be found @ your local Wal-Mart for less than five dollars, to make things go along smoothly. 

Ok, now with December out of the way…onto…February? 

My topic today is going to be natural cleaning (read: non-toxic, mostly cheap) products you can make at home.  I starting doing this back in December, when I picked up a neat little book: Make Your Place off of Amazon.  (I also would like her other book, How to Make soap without Burning your Face Off.  Seriously.)  So, freshly inspired, I ran to the local health food store, well, actually I drove because I hate running, but I snagged a big bottle of Dr. Bronner’s Castile Soap with Almond Oil.  It smells just like a million cherries are crammed in the bottle!  And, over the course of a couple of weeks, I also bought several essential oils: Tea Tree, Lime, Tangerine, Eucalyptus, and Lavender.  Note that these are NOT aromatherapy blends, these are the real, pure pressed oils from the plants themselves.  You can expect to pay about $5 to $12 dollars (or more) for a small  bottle of these products.  And, no, they do NOT carry them in Wal Mart!  ;0)  Anyway, I have fallen in love with essential oils!  Now, how to make your own products and using oils.

For a great, All-purpose general cleaner, I use this recipe:

1 tsp. liquid castile soap

2 Tbsp. White vinegar

1 tsp. borax (you can find 20 Mule Team Borax @ WalMart in the laundry area)

2 cups hot water

1/4 tsp each:  eucalyptus and lavender oil

3 drops tea tree oil

Mix all ingredients together in a spray bottle.  Do not use on glass. 

It also recommends to spray it on, scrub, and rinse off with a clean, damp cloth (which honestly….I don’t rinse it off  *shrugs*)  I also add a couple more drops of lavender oil because I am so addicted to the fragrance!  I use this on my tile floors, countertops, etc. *Shake well in between uses*

Glass Cleaner:

So very simple:

1 part water

1 part white vinegar

This works GREAT.  I mean, a million times better than “the blue stuff”.  Well, to me anyway!  Make Your Place also has this recipe for a Glass Cleaner:

1.5 cups white vinegar

1/2 cup water

4-8 drops of orange, grapefruit, or lemon essential oil

Combine all ingredients in a spray bottle and shake well.

Let me now add in here that you must, must, MUST use microfiber cloths.  I love my microfiber cloths and can’t imagine ever, in a zillion years, going back to stupid paper towels.  I only use paper towels for grody clean ups like…dog pee.  You know?

So anyway, back to the castile soap.  I have used it straight up as a body wash, as shampoo, and in the kid’s baths.  Also, the label says you can brush your teeth with it.  Did I do it?  Well…let’s just say…do you remember the scene in PeeWee’s Big Adventure where he brushed HIS teeth? (“Mad dog!Mad dog!”) Moving on:

Now for another biggie:

Dishwasher Detergent  (for use in the dishwasher, not the sink!)

1/2 cup liquid castile soap

1/2 cup water

1 tsp. lemon juice

3 drops tea tree oil

1/2 cup white vinegar

Add to squirt bottle container, preferably a recycled dish soap container, right?!?  I personally use about 2 Tbsp with each load, or, 3 good squirts directly in the bottom of the dishwasher. You will need to shake this concoction up vigorously before usage.  If not, it will form this gel-like substance from the reaction of the vinegar/lemon juice to the soap, which, incidentally still works great, but is potent.  I found this out when I added too much of the gel stuff and I had bubbles frothing from my dishwasher!  Lol.  BUT, if you use your dishwasher on a regular basis, like every 2-3 days and keep this shook up, you should not have a problem with the gel formation.  I love this recipe!!!

My only concern would be the breakdown of the fats which are in your dishwasher filter/lines.  I am not sure if this mixture is potent enough to fully dissolve buildup, so you could use your regular dishwashing detergent ever so often if you feel this could be a problem.  Also, I have noticed that it still leaves a thin film on some plastics (like disposable containers) but frankly with the whole Bisphenol A (BPA) and phthalate scare, I’m trying not to use too many plastics for food storage anymore anyway.

Now, a word on essential oils.  Essential oils come in varying qualities.  I just use my local natural foods store because it is convenient and I like the oil quality just fine.  Also, essential oils should be considered as possible skin irritants so DO NOT get them on your skin undiluted. If you want to tinker with making your own aromatherapy/massage oils, the essential oils must be diluted in a carrier oil (an oil which is safe for the skin).  Some essential oils are extremely irritating to the skin!!!  I do not know anything about making massage oils and the like, so you’ll have to do the legwork there!

I hope this will help you all save some money and help you to break the cycle of thinking that we MUST buy specific cleaning products for every purpose, which is just silly!  Many more natural cleaning recipes can be found online.  OH, one last tip.  If you ever have stains/burned on food/etc. on your countertops, bathtub, other solid surface, try using baking soda and a damp sponge.  Make a thick paste of baking soda and water and scrub gently with your sponge OR microfiber cloth.  Most stains/food spills/etc, will just vanish.  It is very similar to using a Mr. Clean Magic sponge….but a looooot cheaper!

Welcome, Ducklings!

NOTE:  This post was written 4 weeks ago, I am updating it today. 

Well, by the sheer grace of God, my duck eggs made it all the way to their hatch day!  I patiently waited till Christmas Day…no duck.  Then I figured, well, I couldn’t QUITE remember what day I had begun to incubate the eggs under Henny Penny originally, so I could be off by a few days, plus the fact the eggs were chilled, could mean they may hatch even a few days later.  Well, finally, by Sunday, the 27th, I had a pipped egg.  This means that the chick has made a tiny hole in the egg and cracked the shell just a bit.  It can take 24 hours and sometimes even a bit more before anything else happens, since at that point, the chick is now breathing outside air and is rapidly absorbing the last of the yolk while the blood vessels in the egg are shrinking and receding.  So, I waited.  And waited.  And waited.  

Nothing, but some peeping from Duck A from his shell.  Then, at about 9:45am on the 28th, Duck B pipped his shell while I was watching.  It was really cool! But, no progression from Duck A.  

So, after 24 hours had passed (@ 8pm on the 28th), I decided to see what was going on with little Duck A.  Turns out, he was a ‘breech’ duckling.  There is a large air sac in the egg which a chick first enters before breaking the shell.  In Duck A’s case, he was facing the wrong way, with his little head between his legs, so he could not penetrate the air sac.  So, he was a stuck duck.  I very carefully removed a bit of the shell as well as opened the underlying membranes until I saw a little blood.  So, I stopped, and returned him to the incubator.  It’s not uncommon for a malpositioned chick to die from simply not being able to break out of the shell.  Now, Day 3.   

By Day 3, Duck B was well progressing into his hatch.  He had already broke a big chunk from his shell:  

Duck B has now made a larger hole in his shell and is preparing to make his escape


Poor Duck A was making no progress at all, so I knew it was time to really help him out.  I peeled off a lot of the shell, removed some of the white, tough membrane and then peeled back a little bit of the inner membrane.  Then I covered it with a damp paper towel (to keep the humidity up) and set him back in the incubator.  Not an hour passed and little Duck B began ‘zipping’ around his shell:  

Duck B is almost out!!! Duck A is beside him still stuck, and wrapped in a paper towel.


Then, with a final push, Duck B made it out!  He was jumping and flopping all over the place.   

Duck A is very much stuck and in a backwards position in the shell.

 It was sooooo exciting!  There has to be a God…should you have any doubts about that, you need to incubate yourself some eggs…it is just amazing.  

And now it is January 22nd.  The ducks are now outside in the ‘big duck’ pen and are bigger than you could possibly even imagine.  The adult ducks and especially the geese pretty much wish the babies would evaporate into thin air, but they’re getting along OK. Oh, I forgot…I bought 8 more baby ducks a week after my 2 little black ducks were born.  So, ten little peepers!  I love my ducks.

She’s Crafty, and She’s a Momma Duck

Arg, a whole week gone by already?  And no new post from me?  Sigh.  My computer bummed out on me last Saturday and it’s on crutches now.  Anyone want to donate a netbook?  Lol.  Well I am STILL not finished with my other mystery crafts, which I promise to reveal soon…maybe as soon as tomorrow if everything goes right! 

In farm news, I ‘pulled’ my 2 fertile duck eggs from the chicken coop since ‘Henny’ the Silkie decided not to incubate them any longer.  Duck eggs take 28 days to hatch, and chickens take 21 days, and I just think Henny got sick of waiting.  So, I took them in on a cold morning, pretty sure the embryos were dead, but I stuck them in a makeshift incubator anyway.  It took several hours to bring them back to a good temperature (about 101 degrees).  Sure enough, the little ducks began twisting and turning in their eggs! I have to turn the eggs 3-4 times a day and mist them, and keep water trays in the little incubator full to keep the humidity up.  As strange as it is, the eggshell is very porous and the embryo can lose too much water if the egg’s surroundings are too dry.  It’s really surreal to look inside the egg (via a flashlight) and actually see blood vessels and a tiny little embryonic duck swimming around!  Even more unbelievable is that I am actually keeping these little guys alive with the crudest incubator you could imagine.  Well, it isn’t as bad as a cardboard box and a light, but we’re almost there.  I’ll post a pic soon.  Anyway, one eggs is slated to hatch Christmas Day and the other will be the 27th, which is that Sunday. 

More crafts and duck news soon!

Crafty Country

What else to do when the days get short, cold, and dreary but to whip out the glue gun, glitter, and yarn?  Yes, I’ve gotten crafty in the country!  I find that my mood greatly improves just by gluing, glittering, or baking something.  This week’s crafts include a candy wreath, lampshade, dog sweater, and a mystery craft, which I will reveal soon!

THE CANDY WREATH

So super easy to make!  I bought 2 – 3# bags of hard candy @ Dollar General for about 6 bucks.  The hanger was free and the ribbon was a dollar for 9 yards at Wal Mart.  I am going to post the how-to video, but may I say first that I deviated from the instructions (what a shock!) and did not clip off the ‘hanger’ part of the hanger (why create extra work???) and just simply did no wire cutting and used the ‘hanger’ part to hang up the wreath.  My wreath came out looking more like an oval shape, but what do you expect when you have 6 pounds of candy hanging on a little wire?  Oh well, it’s still tasty.

My Candy Wreath

Fun for all ages!  Plus you get to eat the leftovers!

RE-COVERING A LAMPSHADE

I took the girl’s lamp and re-vamped it for my 1950s look.  I got the chenille bedspread out of the trash (some poor creature had tossed it out not thinking about all that CRAFTING you can do with it), so it was free, and the lamp was my Mamaw’s, I think, and really all I purchased was the shade and the ball fringe (WallyWorld).  I am posting a video so you can see how I did this.  I did tuck the fabric back up into the shade on the edges (should have trimmed it more, but oh well), and lastly I hot glued the ball fringe on the inside of the shade.  Originally the shade was just a plain white number, but somehow it got a greasy stain on it, and I am kinda glad that it DID, otherwise I probably wouldn’t have thought to re-cover it. 

Chenille covered lampshade

This was so super easy and fun to do.  I have now officially fallen in love with spray adhesive.  For the record, I used Elmer’s spray adhesive, but 3M’s Super 77 is awesome stuff, I just didn’t have that much cash on me!

Well, that’s it for this go-round!  More crafts will be revealed later this week!  Stay tuned!